
Roofs, Walls, Floors – Junctions and Openings
In this blog you will find advice for fitting Low-E Insulation in roofs, walls and floors, along with drawings of openings and junctions details. We have put this blog together to help you through the basics. Installing Low-E Insulation is relatively simple and it can be done by any competent DIY enthusiast or trades person.
For more details on installing Low-E Insulation, including precautions, repairs and how to join rolls you can read our General Install Guidelines.
If you have any questions about installing any of our products in any application, please get in touch.
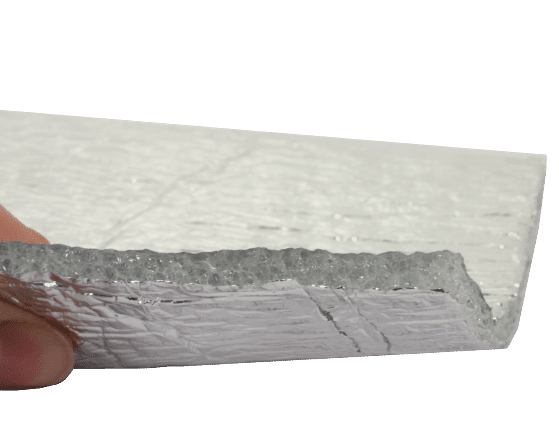
Low-E Insulation is lightweight and flexible yet sturdy enough to hold its own weight. It moulds easily to awkward corner making installation super quick and easy.
Roof Insulation
Above and Below Rafter
There is no safety equipment or protective clothing required to handle or install Low-E Insulation. A staple gun, utility knife and a roll of Low-E Seam Tape are the only items required for general installation.
Low-E Insulation can be installed with either side facing out and can be nailed or screwed through to fix in place and can be installed with either side facing out. Our unique composition mean Low-E will not drag on screws and will self-seal around any fixings that puncture it during installation.

Unrolling and Fixing
You can use this method to install either above or below the rafters.
Roll out Low-E Insulation either parallel or perpendicular to the rafters. Alternatively you can cut Low-E to length and then place it on the roof. Staple Low-E in place on the roof as you go.
Always cut Low-E 50-100mm longer than required to ensure all exposed ends of Low-E can be folded back to stop air ingress. Make sure the material is running square with the roof. If needed you can use double sided tape on the rafters to help hold Low-E in place, or secure the start of the run in place using a C clamp and a block of wood.
Openings and Junction Detail – Over Rafter
Rafters should be counter battened, the roof membrane installed, and the roof finished to requirements and applicable standards. If a roofing deck or sarking board is being installed, you can allow Low-E to sag between the rafters to create an airspace between Low-E Insulation and the board. If you install Low-E Insulation PERF on the external side of the roof and you also require a vapour barrier below the rafters (internal side), you can use Low-E Insulation Ezy Seal.
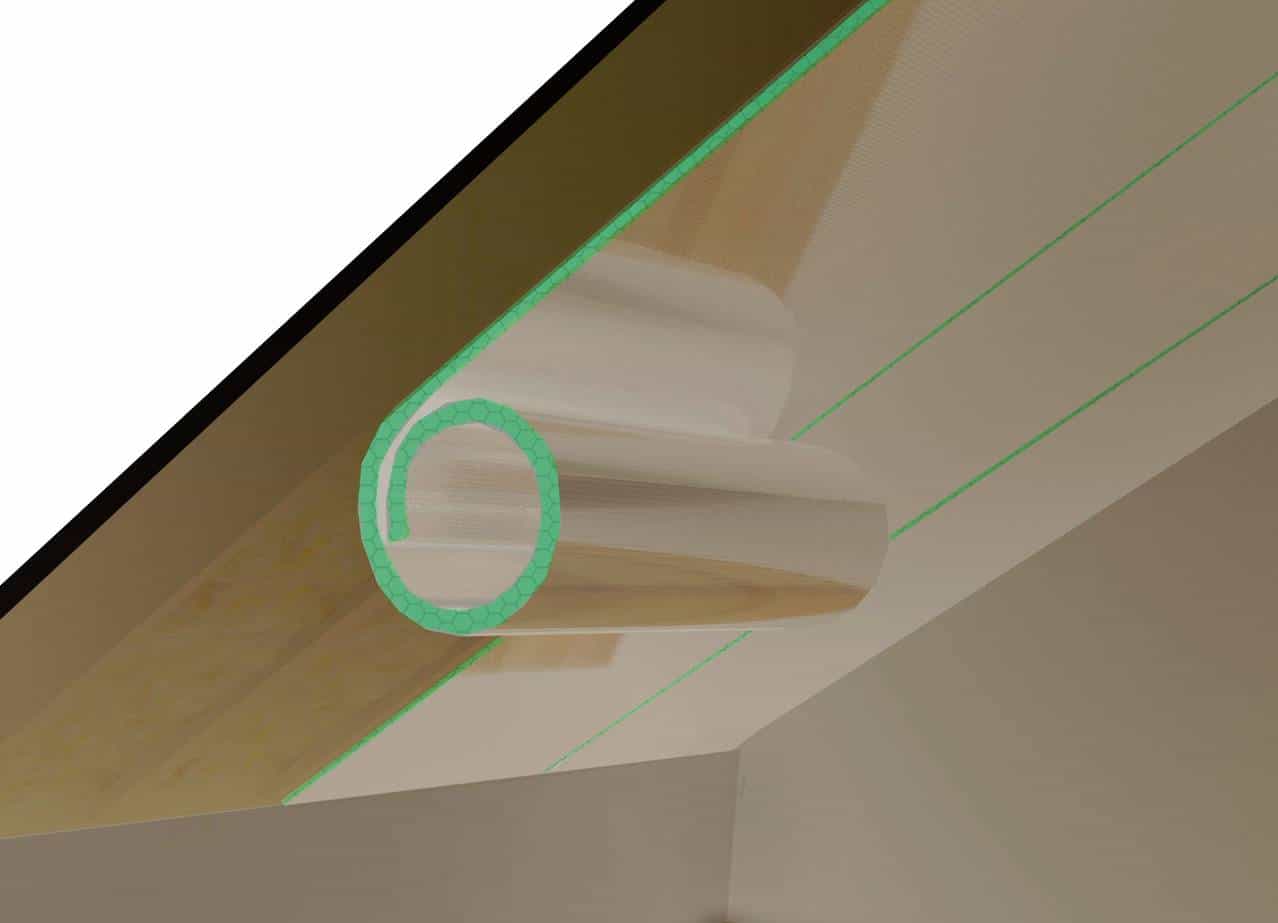
Ridge Junction Detail

Eave Junction Detail

Wall Junction Detail

Wall Junction Detail

Roof Light/Opening Junction Detail

Openings and Junction Detail – Below Rafter
Once installed, the rafters should be counter battened to create a service void and the ceiling finished as per requirements.
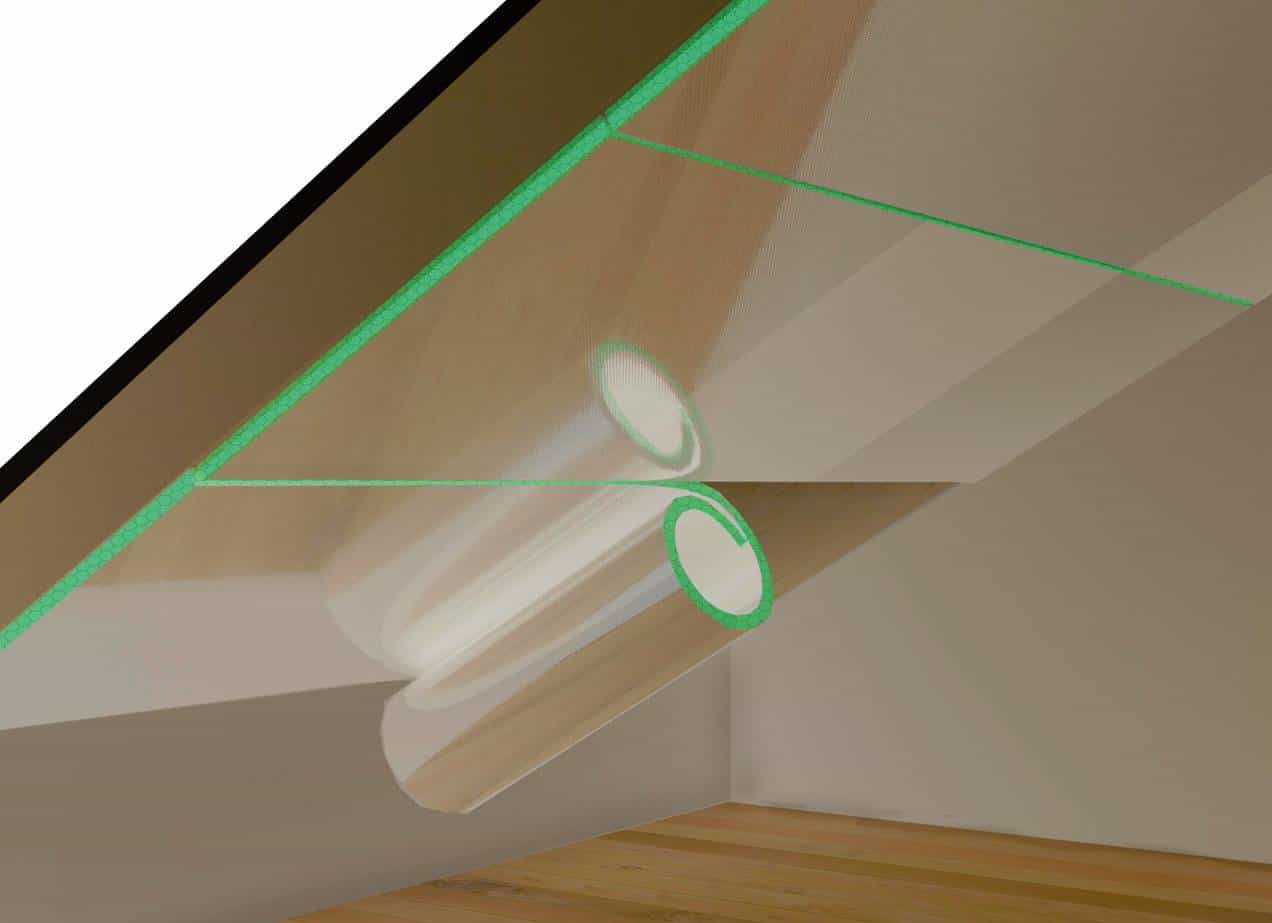
Ridge Junction Detail

Ridge Junction Detail

Ridge Junction Detail

Wall Junction Detail

Roof Light/Opening Junction Detail

Loft Fitting Detail – Under Rafter
Installing Low-E Insulation in a loft space in easy. It is always recommend that Low-E Insulation PERF be used where there is additional insulation on the warmer (internal side) of the roof. This will allow moisture to dissipate out of the roof through the Low-E PERF

Loft Fitting Detail – Over Joists
Walls
Above and Below Rafter
Low-E Insulation can be installed on the internal or external side of a wall. In this example Low- E is installed on a timber frame.
It is always recommended that you use Low-E Insulation Ezy (Vapour Control Layer) on the internal side and Low-E Insulation PERF (breathable) on the external side.

Unrolling and Fixing
Low-E Insulation should be rolled out across the face of the wall. It can be rolled out either parallel with the floor or vertically. Alternatively you can cut Low-E Insulation to length and then place it against the wall for fixing.
Staple Low-E Insulation in place as you move along the frame. Always cut Low-E 50-100mm longer than required at all ends, to ensure all exposed ends of Low-E can be folded to stop air ingress. Make sure the material is running square with the wall.
You can use double sided tape on the frame to hold Low-E® in place when you are starting the run. Or secure the start of the run in place using a C-clamp and a block of wood.
Once the run is complete go back to start and roll the out the next length as before. Join runs or rolls together as described in the ‘Joining’ section.


Walls – Openings and Junction Details
Ridge Junction Detail

Eave Junction Detail

Wall Junction Detail


Floors – Openings and Junction Details
Low-E Insulation can be installed on suspended floor, solid floor and our SlabShield Insulation is made specifically for use with Under Floor Heating systems.
The method for installing Low-E is very straight forward. Always cut Low-E Insulation 50-100mm longer than required to ensure all exposed ends of Low-E can be folded back to stop air ingress.
Make sure the material is running square as you unroll it. If needed you can use double sided tape to help hold Low-E in place, or secure the start of the run using a C clamp and a block of wood.
Suspended Floor – Over Joist

Suspended Floor – Under Joist

Solid Floor

Underfloor Heating UFH (with screed)

Want to get hands on with our products?
Request a FREE sample

Recent Comments