")
General Install Guidelines
Installing Low-E Insulation is relatively simple and it can be done by any competent DIY enthusiast or trades person. We have put this blog together to help you through our basic general install guidelines.
There are more details including installations methods for roofs, walls, floors, junctions and opening detailed in our blog Roofs, Walls, Floors – Junctions and Openings opposite.
If you have any questions about installing any of our products or any application please get in touch.
No multiple layers, no frayed edges, no dragging on screws, Low-E® will save you 50% on your install time.
Some of the most common questions we get asked concerning general insulation steps are;
- What you should know before you start insulating?
- What precautions do you need to know before insulating?
- Airspaces when installing insulation
- Installing insulation with joining rolls
- Installing insulation with taping rolls
What you should know before you start insulating?
There is no safety equipment or protective clothing required to handle or install Low-E Insulation. A staple gun, utility knife and a roll of Low-E Seam Tape are the only items required for general installation.
Low-E Insulation can be installed with either side facing out and can be nailed or screwed through to fix in place and can be installed with either side facing out. Our unique composition mean Low-E will not drag on screws and will self-seal around any fixings that puncture it during installation.
What precautions do you need to know before insulating?
Aluminium is an electrical conductor. Please use caution when working around electrical sources, including overhead power lines.
Low-E should be stored on a flat dry surface in its bag, out of direct sunlight, until it is ready for installation.

Never interfere with the designed ventilation of the building when installing Low-E Insulation.
Although Low-E Insulation products have an excellent fire rating, it is recommended that they should not be exposed to open flames or ignition sources of sufficient intensity during shipment, storage, or installation. 50mm of clearance should be left around heat producing flues or light fittings.

To maintain Class A/ Class 1 Fire Rating, all seams that are left exposed to conditioned spaces MUST be sealed using Low-E Seam Tape.
Install any additional insulation in accordance with the manufacturers’ guidelines. Always build in accordance with applicable standards.
When using Low-E outdoors be aware of glare from the sun; protect your eyes and skin. Aluminium surfaces should not be installed in direct contact with uncured concrete or any uncoated raw metals. Do not walk on Low-E when it is cut before installation. If you have any concerns about condensation risk, please contact your local building control officer for advice.

Airspaces when installing insulation
Airspaces form an important part of the system U-value, when using Low-E Insulation. If you omit or change the size of an airspace you may change the system performance. There are numerous other ways of creating airspaces when installing Low-E Insulation. If you have an application for Low-E Insulation and want to find a suitable way of fitting, please contact us for details.
The simplest and most common way of creating an airspace beside Low-E Insulation is by counter battening with a 2″ x 1″ timber batten but there are dozens of ways of doing this, especially in general construction.

Airspaces can be formed in numerous ways but we find a counter batten is the easiest way in general construction
Alternatively Low-E can be fitted loose and draped into the adjacent cavity to create an airspace
Low-E can also be recessed into an opening and stapled into place to create an airspace
Installing insulation with joining rolls

Overlapping Rolls
Simply overlap the adjoining rolls by 50mm-100mm and seal using Low-E Seam Tape. When you are overlapping rolls, it is important to ensure the overlap does not allow water to get into the structural space.

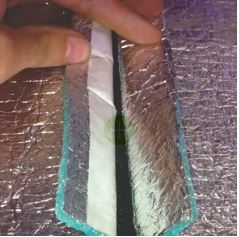
Butt Joining
Ensure the area is clean and dry. Place the two pieces of insulation you want to join together on a clean, flat surface and butt them up against each other. Seal the join using Low-E Seam Tape. Turn the insulation over and repeat on the other side.
In Situ
Overlap the new run of Low-E with the run which is already in place (over the closest support batten) and start fitting the new run. Once the new run is secured, cut along the centre of the support batten where the two runs overlap and remove the waste.
Place double-sided tape on both of support battens and remove the paper backing from the double-sided tape. Put the replacement piece into place.
Apply Low-E Seam Tape to the face of the seams by firmly pressing it down on the tape while running the length of the join. Once complete, the Low-E Seam Tape will blend in perfectly with the insulation.
Joining Ezy Seal Edge
The adhesive strip that runs along one side of the roll will be used to bond to the next length. Ensure the rolls are running level with each other.
Fold back the insulated tab on the edge of the of Low-E EZ and butt it together with the tab on the next roll.
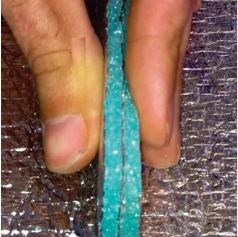
Peel off the release paper and press the two insulated tabs tightly together. For best appearance and easiest installation, it is advisable to complete this approximately one at a time. Staple the seam every 200-300mm. If the EZ strip is not sticking because of moisture in the air, staple every 100 200mm and seal using Low-E Seam Tape.
To maintain Class A/ Class 1 Fire Rating, all seams that are left exposed to conditioned spaces MUST be sealed using Low-E Seam Tape.
Installing insulation with taping rolls

Low-E Seam Tape
Always tape Low-E when surfaces are clean and dry. Low-E should be taped at junctions with walls, windows, and doors. When joining or replacing sections of Low-E, Low-E Seam Tape should always be used. All seams that are exposed to conditioned spaces must be taped with Low-E Seam Tape. Use a utility knife or a pair of scissors to cut the Low-E Seam Tape. Tearing the tape may stretch it.
If it happens (and occasionally it does) that material gets damaged on site after it has been installed. Do not worry, just cut a replacement piece of Low-E slightly bigger than the damaged section. Place the replacement piece over the damaged area and cut through the two piece at the same time.
Remove the excess material and the damaged piece of Low-E. Seal around the edge of the replacement piece using Low-E Seam Tape.
Apply Low-E Seam Tape to the face of the seams. Once complete, the Low-E Seam Tape will blend in perfectly with the insulation.
If you are replacing a piece of insulation in a wall, roof or floor application, we recommend cutting out a piece of insulation along the nearest support battens. This will make it easier to apply the seam tape.
Want to get hands on with our products?
Request a FREE sample

Recent Comments