Garage Door Insulation
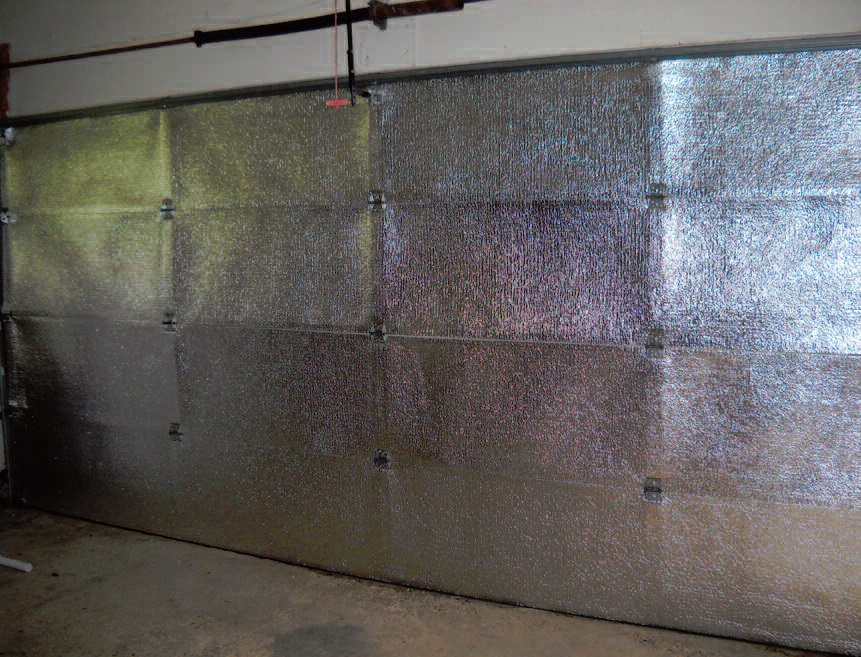
Want to eliminate draughts through your garage door? Low-E Garage door insulation increases R-value, reflects 97% solar gain, stops draughts, and offers moisture protection. It is the quickest and easiest way to insulate and finish off any garage door.
Want to get hands on with our products?
Reasons our customers use Low-E Garage Door Insulation
Installing Garage Door Insulation
Installing Garage Door Insulation
Make the most of your garage by adding Low-E Insulation to your overhead garage door. Low-E can be simply cut with scissors or a utility knife, this makes it one of the best ways to insulate a garage door. It provides moisture control and eliminates draughts which can account for over 50% of heat loss. It is non-fibrous, lightweight and can be fitted by anyone. Low-E is extremely lightweight so spring adjustments should not be needed to support additional weight. Once installed, you can still use your garage door and garage door remote control just like you did before.

How to Install Garage Door Insulation
Whether you want to reduce heating costs in your home or make good use of your garage space, properly installing the right type of insulation is key to it’s effectiveness.
Applying additional Layers – Its only worth using an extra layer of Low-E Insulation if you also have an airspace beside the foil surface. There is no great benefit in doubling up the insulation. To learn more about how airspaces work visit our blog page.
Carefully follow each of the steps below and you will soon have a well-insulated garage door and improve the comfort in your home. Take care when using sharp blades and always refer to manufacturers guidelines.

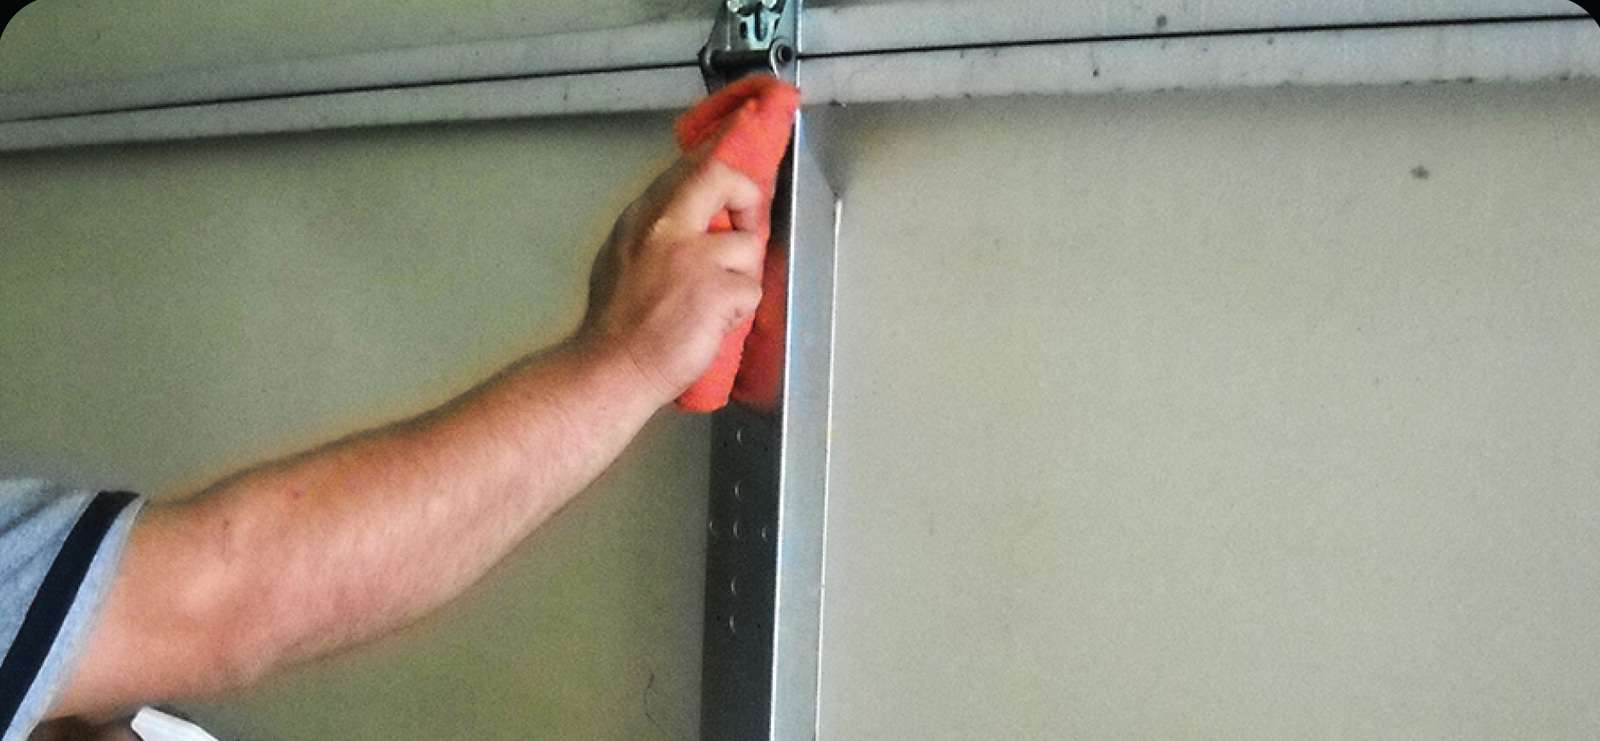
Step 1: Clean the Garage Door
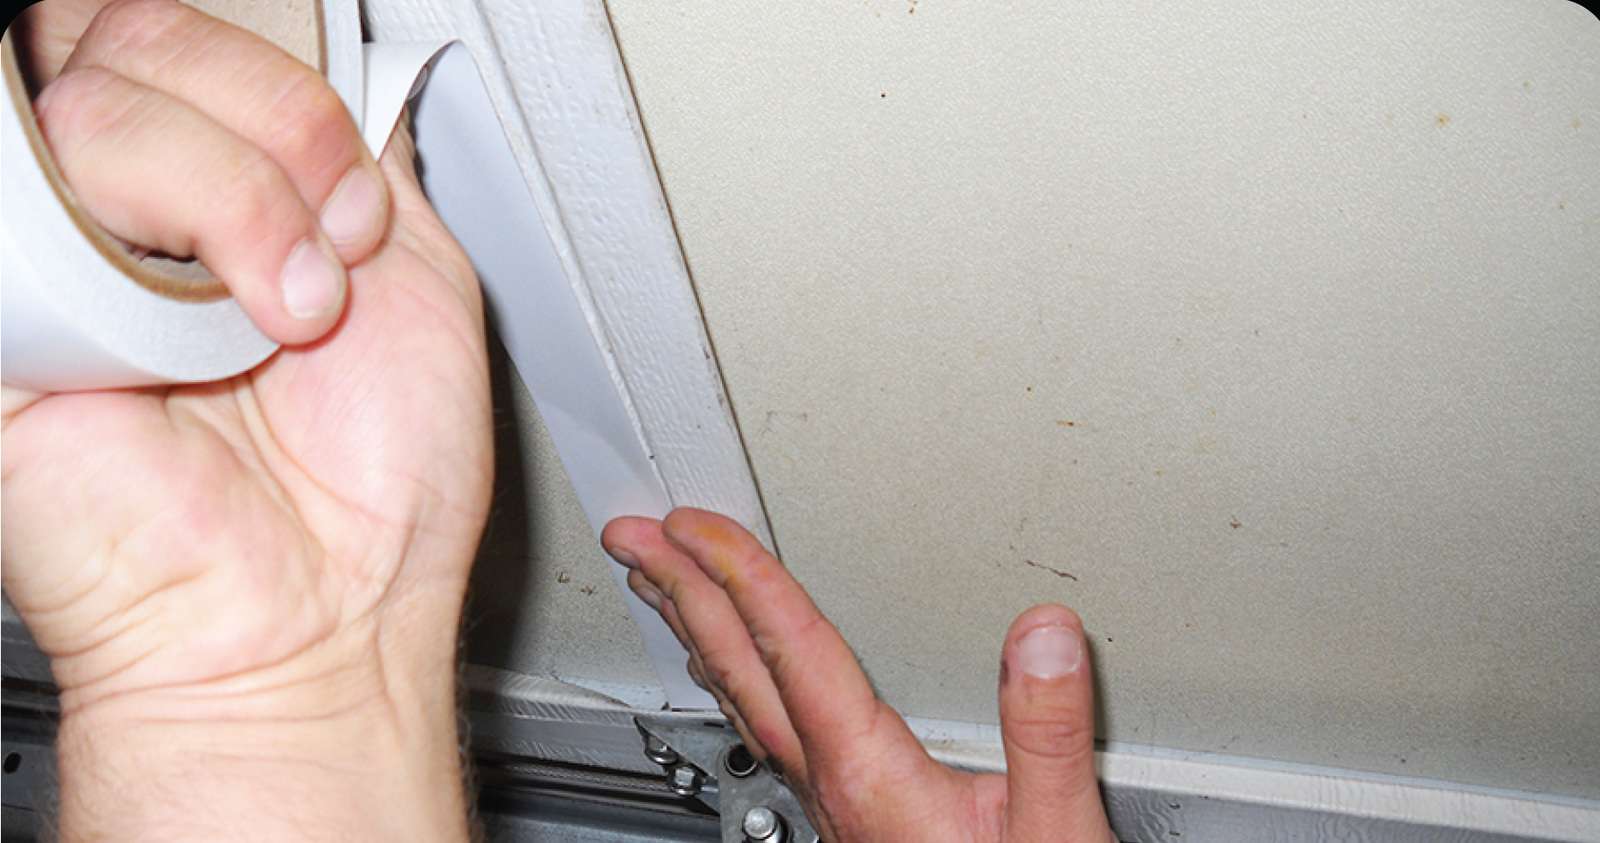
Step 2: Apply Double Sided Tape to the Struts
Apply double sided tape to the struts of the garage door making sure to cover the whole frame. At this point, don’t remove the paper backing on the exposed face of the tape.
Step 3: Apply Pressure to Seal
Using your hand or a plastic squeegee, apply pressure to the double sided tape all the way around the frame to make sure it is securely fixed.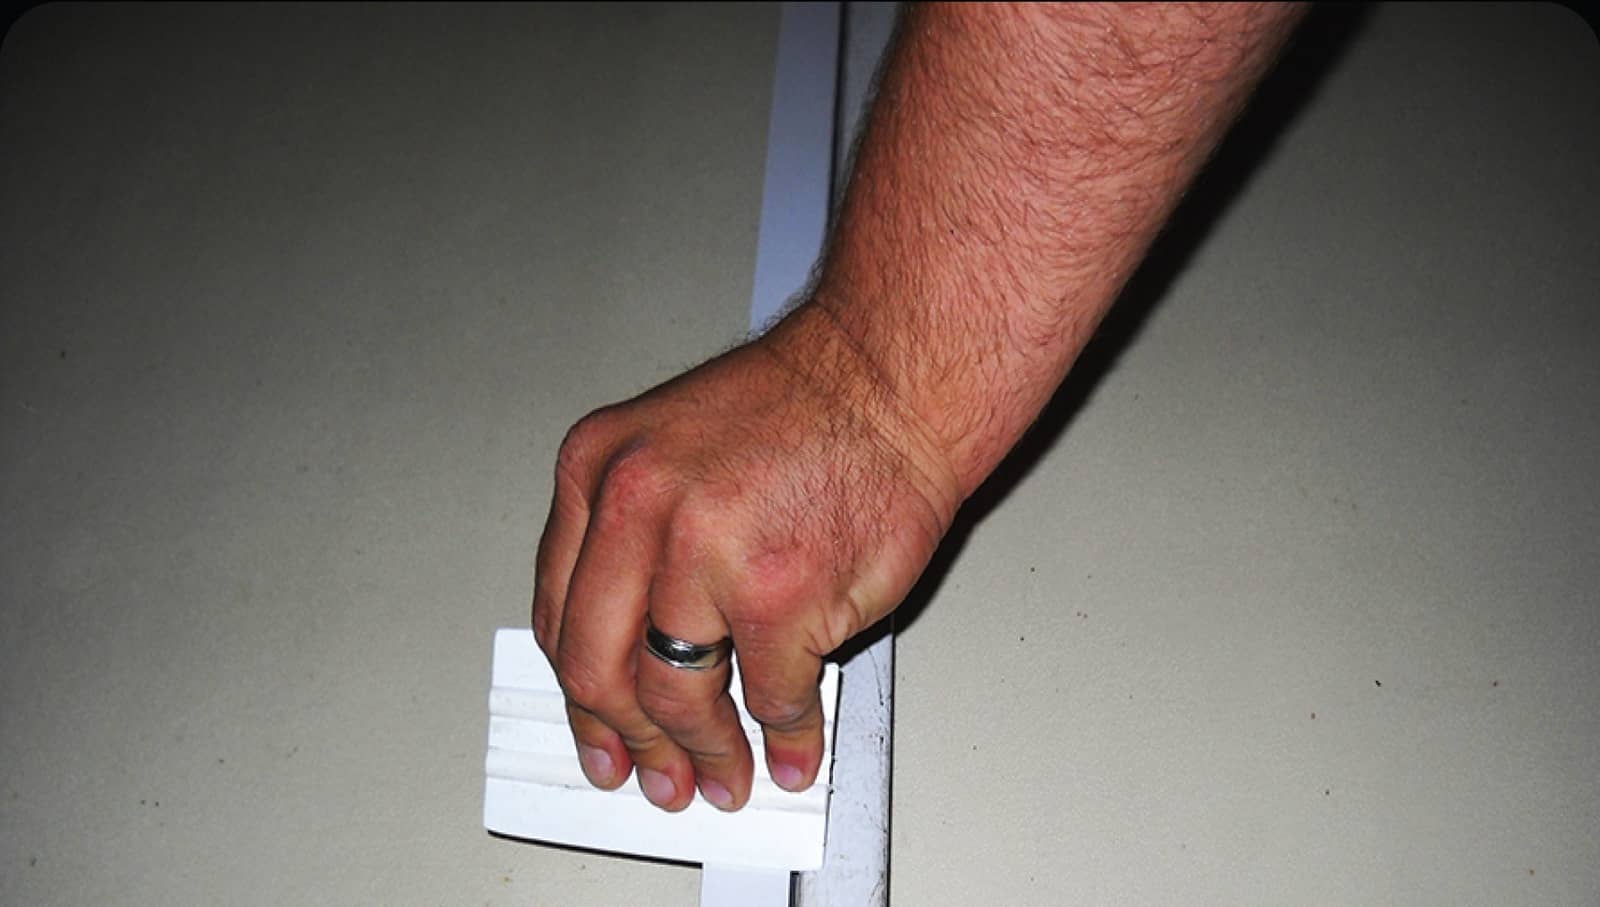
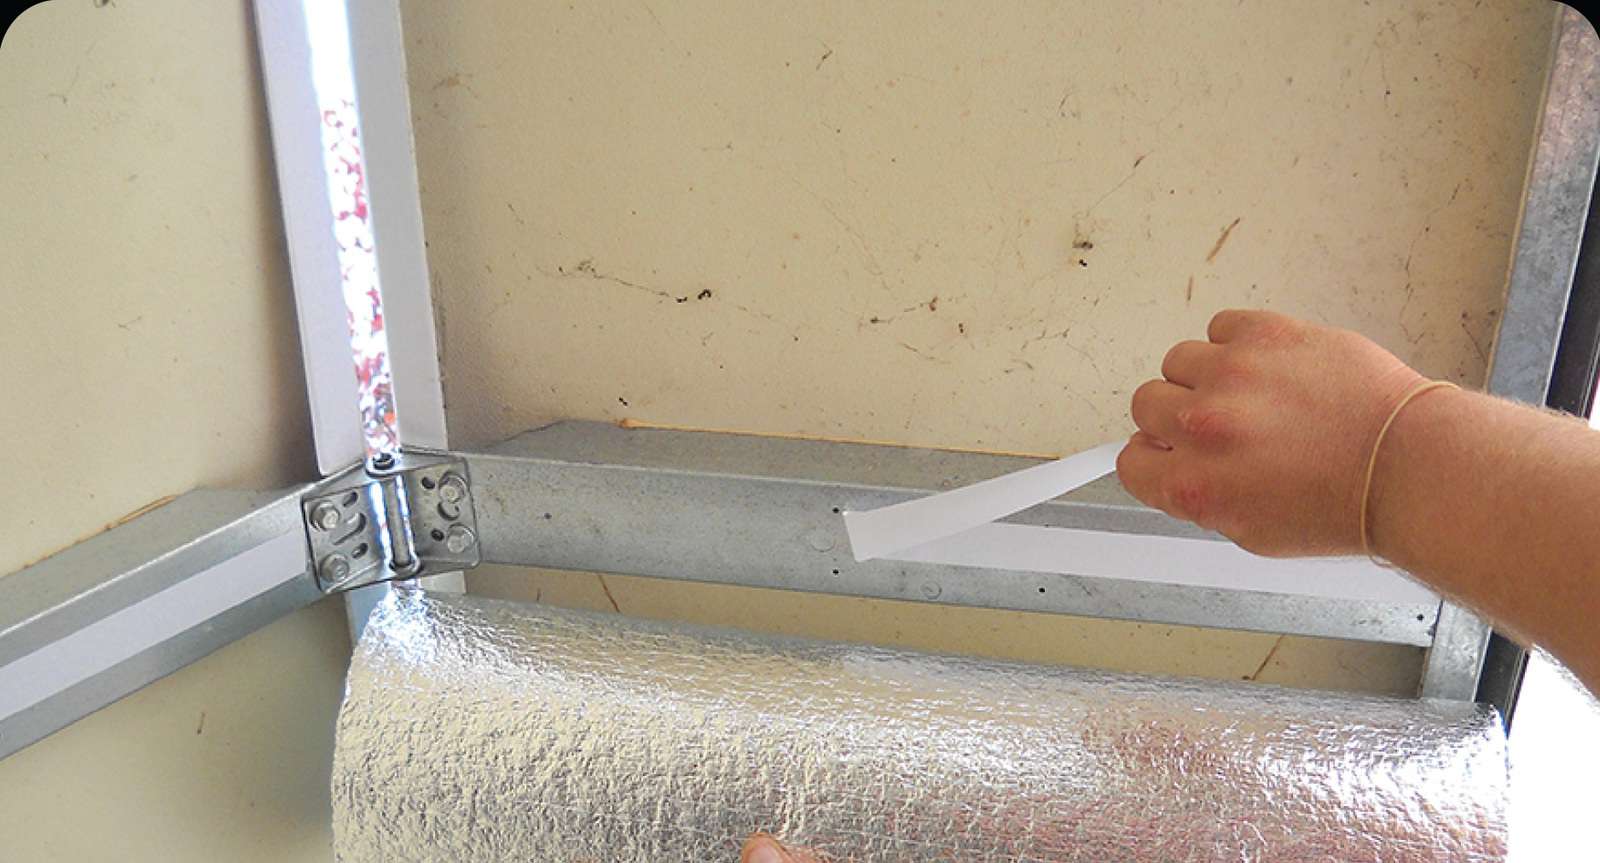
Step 4: Peal off the Paper
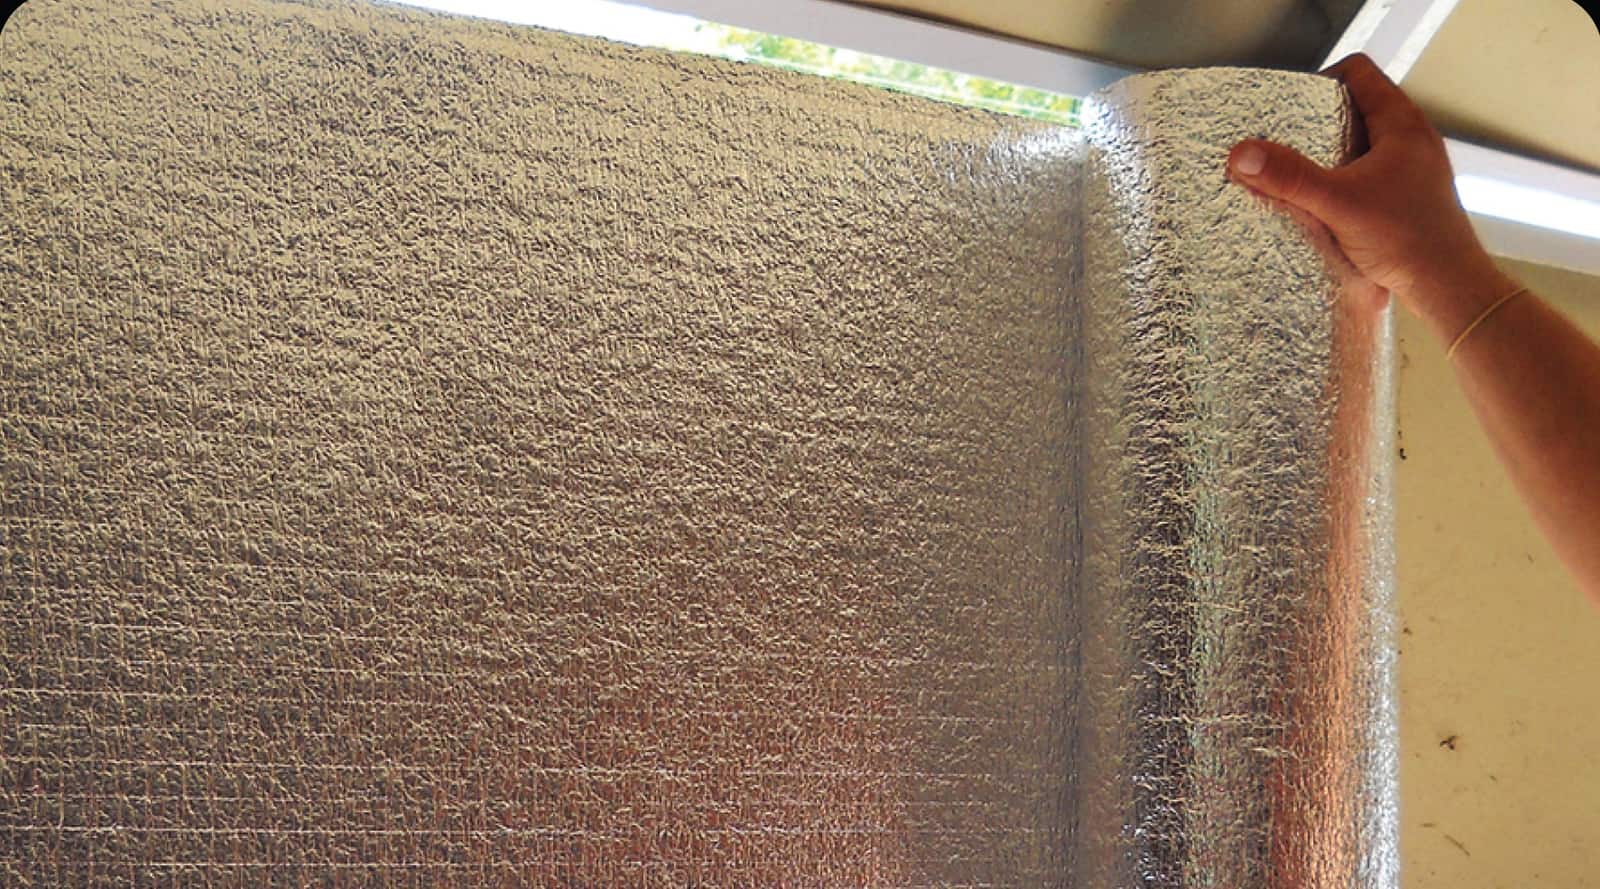
Step 5: Secure the Insulation
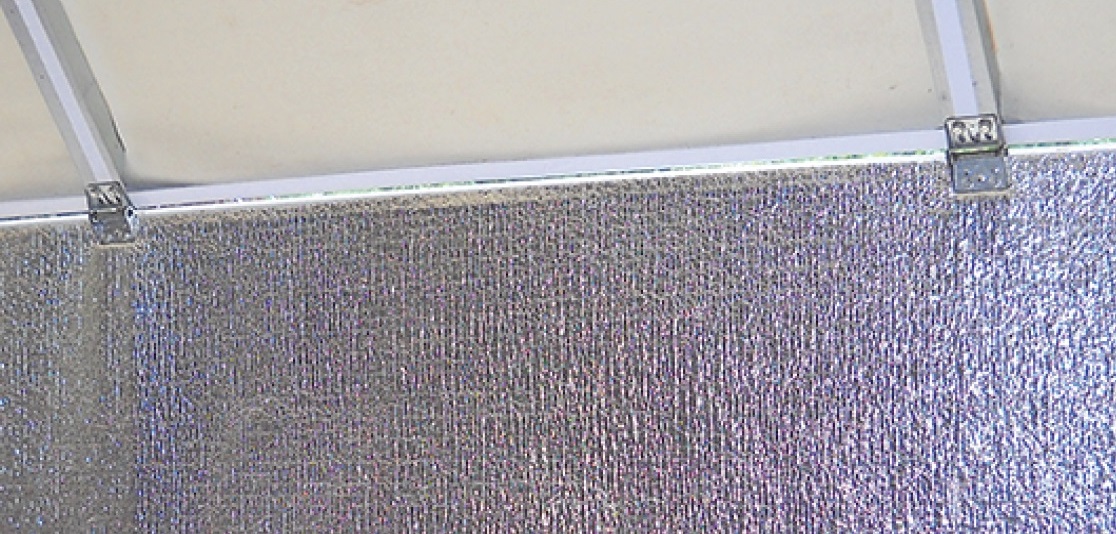
Step 6: Cut Out for Hinges
Step 7: Trim the bottom Edge and Seal the Joints
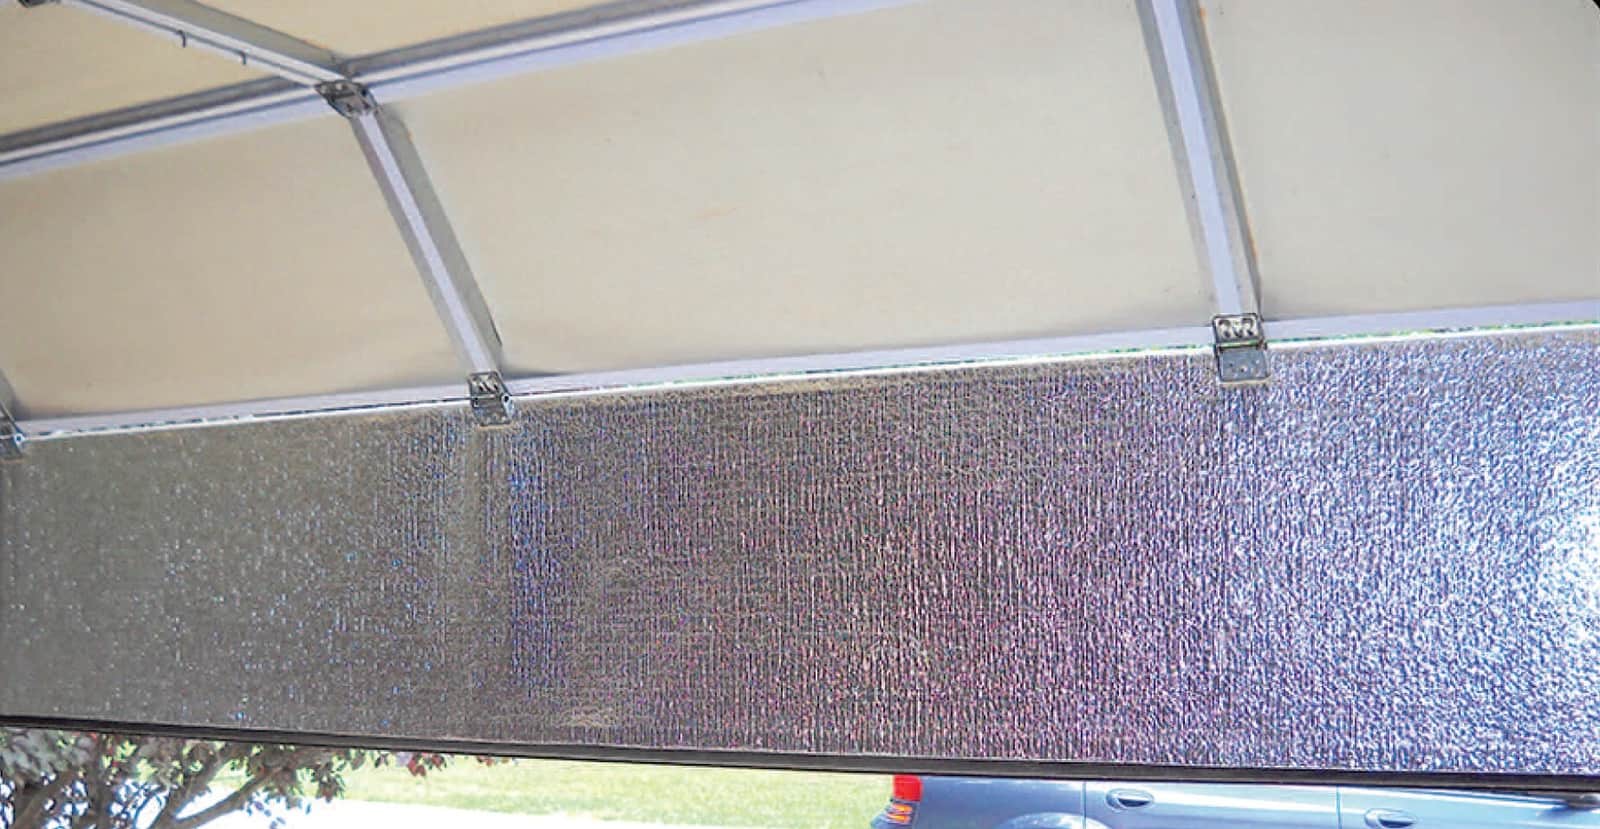
Step 8: Tape all edges
…. And that’s it. You’re finished!