
Beehive Insulation
Used to improve colony survival rates during the colder months, Low-E Beehive Insulation is perfect for reducing wind chill, condensation and keeping the hive warmer in winter and colder in summer.
Want to get hands on with our products?
Reasons our customers use Low-E Beehive Insulation
Why Install Beehive Insulation?

Hive Temperature Regulation
Maintaining an optimal temperature inside the hive is crucial for Bee’s survival and Low-E insulation reflects radiant heat, helping to keep the hive warmer in the winter and cooler in the summer.

Moisture Control for The Hive
Excess moisture in a beehive can lead to mould growth and increase the likelihood of diseases within the bee colony and Low-E insulation is moisture-resistant.

Protection Against Elements
Low-E insulation can provide an added layer of protection against wind and weather, keeping the hive’s internal environment more stable even in adverse conditions.

Enhanced Hive Productivity
By ensuring that the internal temperature is regulated and moisture is controlled, bees can focus on honey production and colony growth rather than survival.
Installing Beehive Insulation
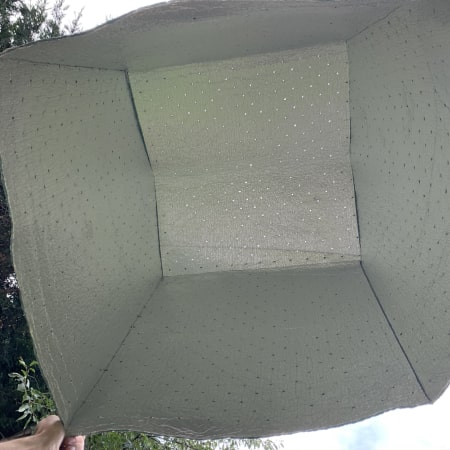
Low-E PERF is a breathable foil insulation product with a patented closed-cell polyethylene core made from recycled material. Unlike many materials used to insulate hives, Low-E PERF is a fully breathable material and has a Moisture Vapour Transmission Rate of 0.11 MNs/g, making it the ideal product for insulating your hive, as any moisture build up can have disastrous consequences for the colony.

How to Insulate a Beehive
Step-by-step Guide

Recommended Low-E Product
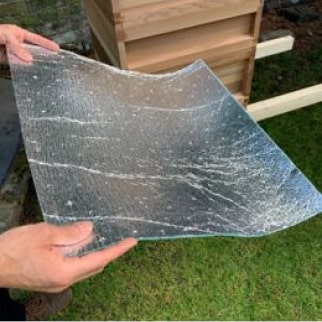
Low-E PERF
Low-E PERF is patented perforated insulation designed to allow moisture to pass through while limiting air movement, making it the perfect beehive insulation material. Low-E PERF can be bought in 4, 12 & 24-metre lengths and is only 5.5mm thick, perfect for insulating beehives without requiring too much space.

Installing Beehive Insulation
How to Install Beehive Insulation
Download this as a PDF
Installing Beehive Insulation
Low-E PERF is a breathable foil insulation product with a patented closed-cell polyethylene core made from recycled material. Unlike many materials used to insulate hives, Low-E PERF is a fully breathable material and has a Moisture Vapour Transmission Rate of 0.11 MNs/g, making it the ideal product for insulating your hive, as any moisture build up can have disastrous consequences for the colony.

How to Install Beehive Insulation
Low-E Insulation PERF is a patented breathable foil insulation with non-toxic closed-cell polyethylene core made from recycled material. Low-E Insulation works by reflecting radiant heat back to the source. Unlike many materials used to insulate hives, Low-E Insulation PERF is fully breathable and has a Moisture Vapour Transmission Rate of 0.11 MNs/g, making it the ideal product for insulating your hive.
It does not matter what type of hive you have, simply follow these steps to insulate any hive and ensure your colony are protected from the cold of winter.

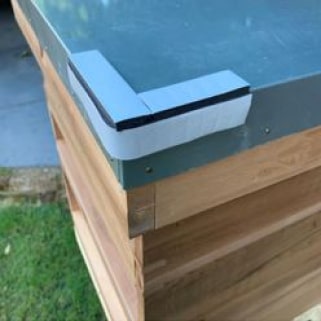
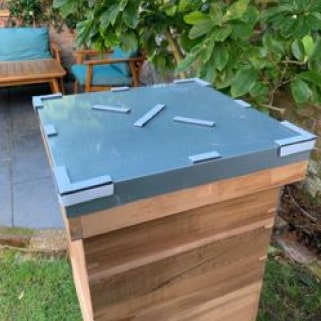
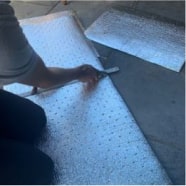
Step 1: Cut and Apply Foam Tape
The foam tape will protect the insulation from catching and tearing on the hive. It will also create a small air space between the hive and the insulation which allows air to move around the hive and moisture to dissipate.
Simply cut the foam tape into small, manageable pieces of approximately 3-4 inches in length. Apply the tape to the sides of each corner of your hives roof, making sure they meet flush at the corner. Then, apply the top pieces to each corner making sure they overlap the side pieces, so they sit flush and form a corner shape.
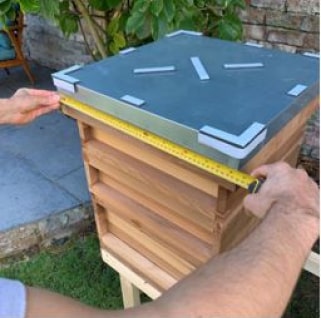
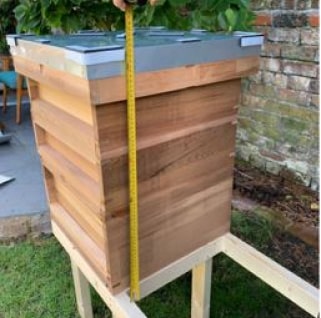
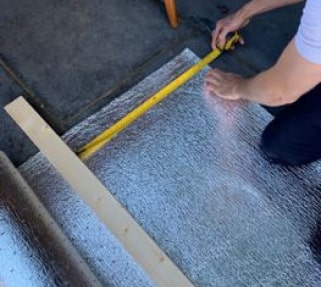
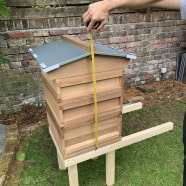
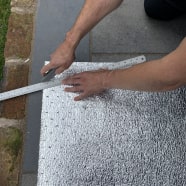
Step 2: Measure Width, Depth and Height of the Hive
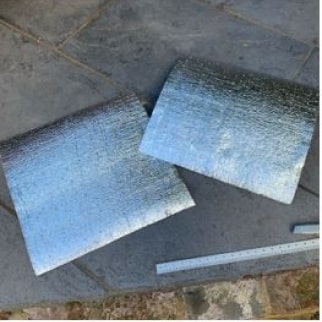
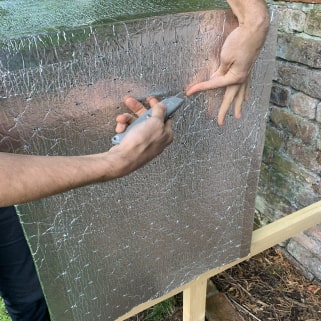
Step 3: Cut the Front, Back and Side Pieces
TIP: The insulation is 1.25 high, so if your hive is less than 625mm high you will be able to cut 1 piece in half and use half for the front and half for the back. You can do the same for the sides.
Step 4: Cut a Piece for the Roof
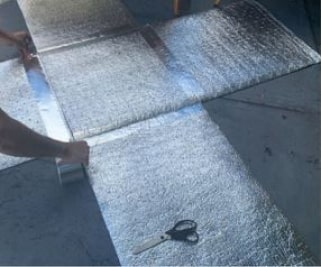
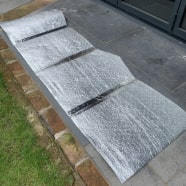
Step 5: Tape the Pieces Together
Cut four pieces of foil tape to match the length of each edge of your roof. Next, cut four pieces of foil tape to match the longest edge of your front, back and sides.
Beginning with the pieces of tape cut for the roof, fix the top of the front, back and side pieces to the roof piece. This should give you a ‘cross’ shape with the roof piece at the centre.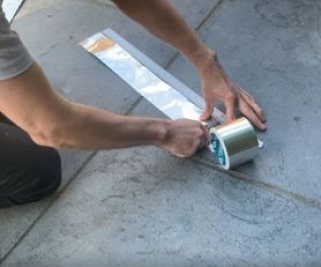
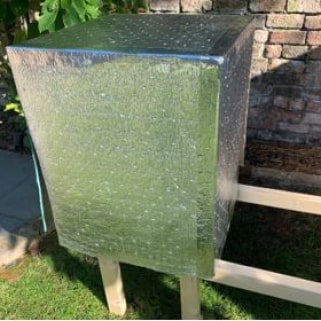
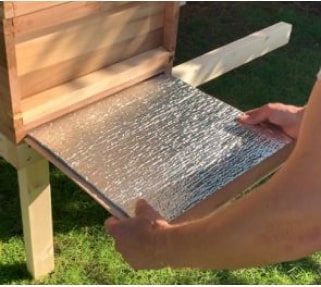
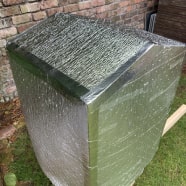
Now sit your insulation over your hive making sure that the roof piece is well positioned to the roof of your hive. The front, back and side pieces should now hang comfortably over the correct panels of your hive. Using your remaining pieces of foil tape, join the corners of the insulation together whilst sat in position on your hive.
TIP. There is no right or wrong order in which to tape the pieces together, however we found this way the simplest. You can tape the front back and side together and then the roof. Or you can tape them all to the roof and then tape the edges.
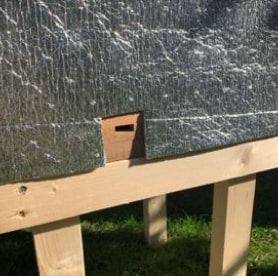
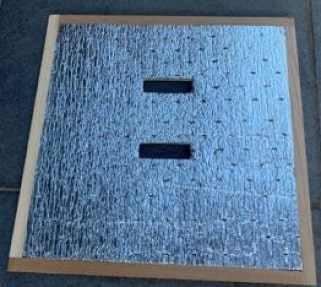
Step 6: Cut a Hole for Access
Your hive is now ready to handle the harsher temperatures of winter, whilst remaining accessible by simply lifting the Low-E PERF wrap on and off.
Step 7: Weather Straps
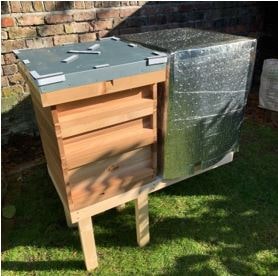
And there you go!
A fully insulated cover AND wrap for your hive, that’s completely breathable, all ready to go for over-wintering. Most importantly, its non-toxic!!
…… did I mention it is made from recycled milk cartons?
Beehive Protection in Extended Cold Periods and Extreme Temperatures
When it gets very cold you have the option of adding extra layers of insulation above and below the hive to further protect your colony from the more extreme temperatures. Although these extra steps are optional, they are worth considering if you live in colder climates.
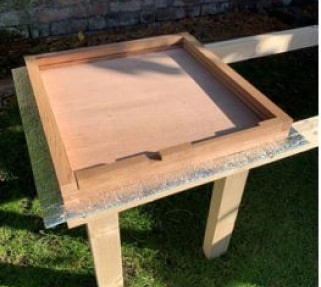
Insulating the base of the Beehive
Insulating the crown board
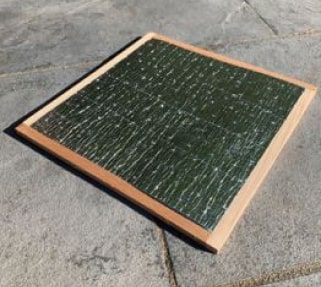
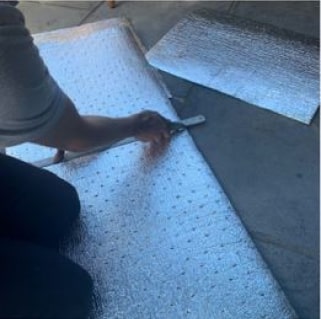
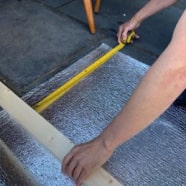
Insulate the Bottom Board
Remove the bottom board from the hive and take its measurements. Using your blade/scissors and your straight edge, cut a piece of Low-E PERF to sit in the bottom board.
TIP: make sure you make the piece of insulation slightly smaller than the floor to ensure the floor fits back into the runners.
Insulating the bottom board will raise the level of the floor by 5.5mm. If there is a lot of waste from your hive you may want to remove and clean this on a more regular basis while the insulation is in place.

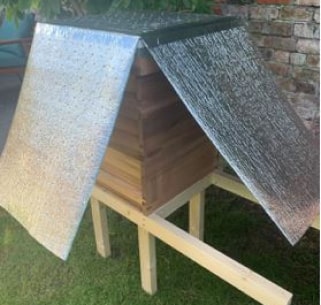
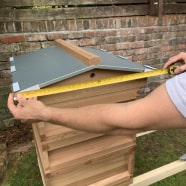
Pitched Roof Hives
You can follow the exact same steps as above
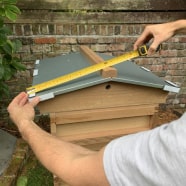
Cut the foam tape and place it on the corners of the hive. Measure the width, depth, and height of the hive. Measure the roof from the centre to the outer edge.
Cut the pieces of insulation for the front, back, sides and roof. 2- Cut the pieces of insulation for the front, back, sides and roof.
Tip. You can cut to front and back to the highest point and trim to accommodate the slope of the pitched roof.
Tape the front, sides and back together along the edges. And then tape the roof in place
TIP: We found it easier to tape the roof to the sides, place the cover over the hive and then tape the roof to the front and back along the pitched edge.

The last thing to do is to cut out the entrance.
And that’s it, you’re all done !!!
